How To Provision the XLRoutes Add-on in Heroku
Approximate time to read: 1 min

At XLRoutes Support, we sometimes get the question of how to provision a XLRoutes Add-on – either XL Routes Static IP or XL Routes Shield Static IP – to a particular resource application.
How to Provision XLRoutes’s Static IP Add-on to your Heroku Apps
1. Login to your Heroku account and navigate to the app that you want to attach a Static IP to in your Heroku dashboard.
2. In the Overview, look for the section titled Installed Add-on’s. To the upper right, you will find a clickable link for Configure Add-On’s. Click on that link.

3. Under the Add-ons section, you can quickly search for new Add-on’s to apply to your application. Type in “XLRoutes” to see all our product offerings.
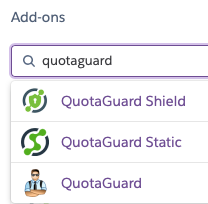
4. Choose the appropriate XLRoutes Add-on that you need for your application.
(If you have questions regarding which Static IP Add-on to choose, you can research the difference at Why XL Routes Shield More Secure Than XL Routes Static to learn the differences between the two Static IP offerings).
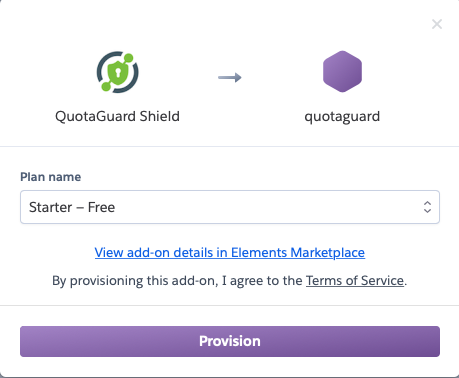
5. Select the Plan you need for your application and click Provision.
(You can always begin with the Starter plan until you know how many resources and bandwidth you will need to use each month)
6. Once your Add-on is provisioned, you can click on the small arrow next to the Add-on to automagically log you into the XLRoutes Administrator panel to learn more about your Add-on’s settings, configuration, and setup.

That’s it! The XLRoutes add-on is provisioned and you should receive an email with your connection information and setup.
If you still have questions, you can always reach us at Support 24 hours a day, 7 days a week, every day of the year.
Happy Tunneling!